One of the most used techniques in biology and biochemistry, Western blots are also one of the hardest techniques to master. Though every experiment involving Western blot may differ, especially as it regards protein source, antibodies, and protein modifications, there are certain methods and principles that can be implemented throughout the technique. Here, we’ll review a few basic tips to help get your Western blots running consistently, hopefully providing meaningful and reproducible results.
Avoid overloading gels and use loading tips
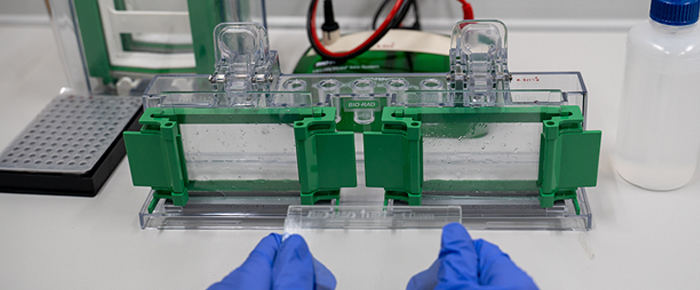
Spillover is a common issue with gel electrophoresis. It’s recommended to load only up to 75% of the volume of each well, which will prevent liquid from flowing into adjacent lanes before or during protein migration. Spillover can also occur if standard 200 µl or 1 mL pipette tips are used as they cannot directly enter the wells. Using loading tips can ensure all liquid is evenly distributed among each well, without any entering adjacent wells or the surrounding buffer.
Validate and optimize antibodies
This is an essential step to ensuring that the bands you identify are, in fact, the proteins of interest in your samples. It is recommended to perform validation with both primary and secondary antibodies. Secondary antibodies can be validated quite easily, as running a blot without incubation of primary antibody will allow you to see any nonspecific bands elicited by the secondary.
When testing primary antibodies, reserving a lane for purified protein (either denatured or native, depending on the antibody) is one of the best options. Remember that the purified protein should ideally match the species your samples were procured from. Unfortunately, purified protein isn’t always an option; instead, use lysates from cells that have either been knocked out for the protein of interest and/or those that overexpress the protein.
Antibody optimization often occurs simultaneously with validation, as several unintended results can occur, like being unable to see a band or obtaining too many nonspecific bands. If it is difficult to see a band, several things can be done: increase the amount of protein or primary antibody, use BSA to block instead of milk, reduce the amount of washing steps, or expose the blot for longer, among other options. When there are many strong bands, it is first worth verifying whether they are nonspecific by using a stronger blocking method and reducing antibody concentration or the amount of sample. If the bands remain, verify that these are not degraded proteins (which can be rectified using protease inhibitors) or dimers and trimers (which can be rectified by boiling the sample longer). They may also be post-translationally modified proteins, so check in the literature whether this is possible, and if necessary, adapt methods for removing these modifications (e.g., PNGase F can be used to remove glycosylation).
Adapt the protocol for high MW proteins
When transferring proteins above 100 kDa in size, be aware that methanol can prevent proteins from migrating from the gel matrix to the membrane. Therefore, when running these samples, the transfer buffer should contain very little or no methanol. PVDF membranes should also be prioritized over nitrocellulose membranes for high MW proteins.
Additionally, always keep in mind the percentage of acrylamide when running gel electrophoresis. Lower percentages of acrylamide are reserved for higher MW proteins. Larger gels can also be used, or acrylamide gradients can be utilized instead of a set percentage. Note that western blots are generally limited to 10 kDs to 250 kDs, so other separation and detection methods are required if the protein size is outside this range.
Recognize the difference between denatured and native SDS-PAGE
If no signal is obtained on your blot, it’s possible that the epitope recognized by the primary antibody has been denatured prior to running gel electrophoresis. It’s recommended to verify before running gel electrophoresis whether the antibody binds to the native or denatured epitope of the protein.
Track samples and blots digitally
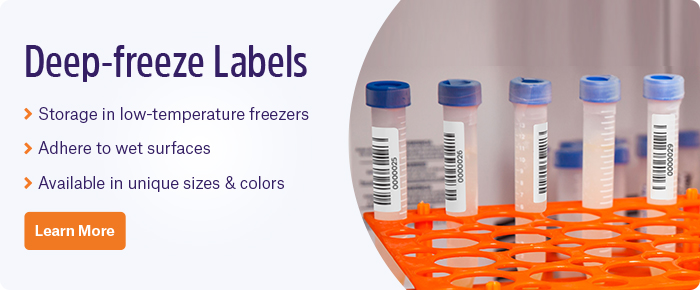
An overlooked aspect of running Western blots is tracking samples and blots as they are prepared and analyzed. While samples and reagents stored in tubes and vials can be efficiently identified using barcode and/or RFID labels, Western blot membranes may be more challenging to identify, as affixing labels directly to the membrane may result in unwanted crimping. If labels are to be affixed, they should be relatively small and contain a 2D barcode, which helps maximize the amount of information stored per label area. The labels should be resistant to long-term immersion in water and buffers and printed with a thermal-transfer printer to ensure the ink doesn’t leach into other solutions. If you need to avoid labeling the blot directly, it is best to store them in dedicated boxes at 4˚C (if still in use) or in plastic bags at 4˚C, -20˚C, or -80˚C. If stored in bags, cryogenic labels are recommended, as they resist temperatures as low as -196˚C.
However, if blots are identified, it is important to utilize barcodes and/or RFID labels in conjunction with a laboratory information management system (LIMS) alongside an electronic laboratory notebook (ELN). The digitization of laboratory information is a crucial step in standardizing laboratory practices. Using these systems, samples can be accurately and consistently tracked throughout entire workflows, from the time the sample is homogenized to the analysis of the bands on the blot. Ultimately, these systems work to reduce human error, enhancing productivity and promoting a higher degree of reproducibility.
LabTAG by GA International is a leading manufacturer of high-performance specialty labels and a supplier of identification solutions used in research and medical labs as well as healthcare institutions.

