Keeping your thermal-transfer printer in proper working order doesn’t take much work, but it does require a bit of know-how to understand the mechanisms and appropriate methods of maintaining it. Like any machine, keeping it running smoothly will reduce errors and ensure that the printer functions normally for as long as possible.
Clean the print head and platen roller
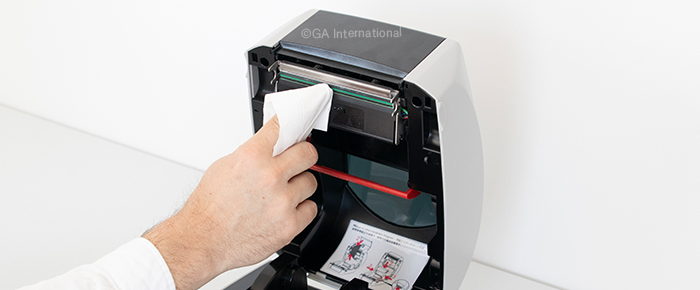
With any work area, dust and other particles can quickly build up and interfere with electronics. This is especially damaging for thermal-transfer printers as the accumulation of particles on the print head will lead to reduced barcode quality, which puts your samples at risk of being inaccurately identified. The roller sits directly underneath the print head and should be cleaned, along with the print head, for best results. It’s recommended to clean the print head approximately once every month or whenever a new label roll or ribbon is replaced. Make sure to use a suitable cleaning solution, ideally consisting of 90% isopropyl alcohol, and apply it to a non-abrasive, lint-free cloth.
Clean your printer and printer accessories
In addition to the print head and roller, the interior of your printer should also be kept clean. A soft brush or compressed air can be used to clean the printer and remove dust, residue, and particles. Verify that the media sensor is clear of dust, as this ensures media is fed through the printer properly; the accumulation of dust on the sensor can lead to print errors. If your printer is operating in a harsh environment, the surface and all accessories (e.g. cutters) should be cleaned regularly using a mild detergent, if required.
Utilize an appropriate speed and heat ratio
Maintaining a proper ratio of speed and heat is necessary for optimal printout quality. Faster print speeds may increase the number of labels printed in a given period, but lower speeds are more likely to ensure high barcode quality. Similarly, higher heats increase the amount of ink per label, enhancing barcode contrast; however, it may also lead to barcode irregularities and can even damage the print head.
The best practice is to begin with a relatively slow print speed and use the heat settings recommended by the supplier. Changing heat settings should only be performed via guidance from the supplier or manufacturer, and only if necessary.
Correct ribbon wrinkling
Diagonal lines across the barcode are a typical sign of ribbon wrinkling. This can be caused by excessive heat from the print head, but if lowering the heat doesn’t correct the issue, ensure the printer is appropriately set up and adjusted. Specifically:
- Ensure the ribbon is correctly loaded, properly oriented, and taut
- Check that the media guides are correctly set
- Verify that the head pressure is balanced
If the issue persists, make sure to contact the supplier and/or manufacturer, as they may provide additional guidance.
Avoid contact between the print head and the label
If the ribbon is smaller than the label, there is a chance that the printhead can directly contact the label, causing abrasion and potentially damaging the head. Instead, ensure that the ribbon is always slightly wider than the label so that it only contacts the ink.
Perform a PAUSE self-test
Missing print outputs or streaks in your printout may indicate a defective or clogged print head. This can be diagnosed using a PAUSE self-test following cleaning. The printer user manual will provide detailed instructions on how to perform this test. The supplier and/or manufacturer can also guide you on the proper test method. The self-test will print a nozzle check pattern to see if the print head can print across the entire label width. If a printer problem is identified, it may be necessary to replace the print head. The supplier should be notified at this point.
Use the right labels
Using high-quality labels is essential to maintaining the function of your printer. Ideally, the labels should also be matched to your specific application. Why? Poor-quality labels often lead to adhesive bleeding or oozing as well as unfavorable perforation cuts, all of which can damage the printer’s print head and other components. This phenomenon often occurs due to an excess of heat and/or pressure applied during printing, in storage, or once the label has been affixed to a container. Printing low-quality labels may also necessitate the use of excessive darkness and heat settings to compensate for the poor quality. This, in turn, will shorten the printhead’s lifespan, requiring it to be changed more often and increasing costs.
In addition to using high-quality labels, a quality ribbon should also be used, as this helps protect the print head from abrasion. It is also recommended that the labels and ribbon be compatible, and as mentioned above, that the ribbon is always slightly wider than the label.
LabTAG by GA International is a leading manufacturer of high-performance specialty labels and a supplier of identification solutions used in research and medical labs as well as healthcare institutions.


