 PCR is one of the most commonly performed techniques in life science laboratories. Unfortunately, it’s easy for errors, such as processing the wrong sample or forgetting to add a reagent, to creep up when processing large batches of samples. Here are 13 ways of avoiding PCR errors when running PCR or any of its derivatives, including qPCR.
1 – Set Up a Sterile Environment
Contaminants can lead to false negatives or positives, which can make you second guess your results. These contaminants can come in many forms, from foreign DNA to chemical inhibitors that reduce the efficiency of the reaction. There are several things you can do to minimize contamination of your PCR samples and reagents:
- Use sterile filter tips, which will prevent any contamination from your pipette from bleeding into your samples.
- Dedicate a clean set of equipment, including racks and pipettes, solely for PCR use. This will ensure that there is minimal carryover of particles from one area of your lab to another.
- Set up a reserved space for all your PCR reactions to further reduce particle contamination.
- Apply ethanol, bleach, and RNaseOUT to your bench, pipettes, and racks to rinse off contaminants.
- Use gloves at every step and change them often.
2 – Check template purity and concentration
Regardless of how clean your bench and equipment are, it’s still necessary to verify the purity of your samples prior to running them. Most analyzers will now measure both the concentration and purity of your DNA simultaneously. Always make sure that your 260 nm/280 nm absorbance ratio is at least 1.8. Other wavelengths between 230 nm and 320 nm can be used to detect impurities. For example, high absorbance at 230 nm suggests the presence of organic compounds or chaotropic salts, while a high reading at 320 nm indicates turbidity in your DNA sample, which can be a result of contamination.
3 – Take inventory of aliquoted PCR reagents
Freeze/thaw cycles can play havoc with your reagents if you re-use an aliquot too many times, damaging enzymes and dNTPs via recrystallization. When preparing samples, ensure that you keep track of the number of times each aliquot has been used, ideally using a LIMS, which can manage your entire inventory, including the number of times samples and reagents have been freeze/thawed.
4 – Make sure you choose the right annealing temperature
Another way errors can appear in your PCR results is using the wrong annealing temperature for a given primer set. If the reaction doesn’t work as intended, it is tempting to lower the annealing temperature to increase the chances of having a successful reaction. However, the lower the temperature, the more likely primer dimers and false positives are to appear. It is important to verify the melting curve analysis when performing qPCR, as this is a good indicator of whether the proper annealing temperature was chosen. For new primers, always make sure to determine the optimal annealing temperature prior to running samples. You can then make a table—ideally in your LIMS—of primers sets and their corresponding PCR protocol settings. Primer design software can also help with the initial design, providing proper matching annealing temperatures.
5 – Avoid overloading your wells with product
It’s tempting to run as much product as possible, especially when you’re unsure how efficient the PCR reaction is. However, running a high enough volume in an agarose gel can result in cross-contamination of the wells. Skewed results not only waste your sample but also make it more difficult to identify your samples, particularly if you overloaded samples next to control wells.
6 – Check off each reagent as it’s added to the master mix
For each PCR or qPCR reaction, there are at least 3 reagents, if not more, that need to be added to a master mix, which can then be aliquoted to any number of individual wells. Checking off reagents as they’re added is necessary to ensure that each reagent is added at its proper concentration and not left out or re-added inappropriately. The best way to do this is by scanning the barcode labels of each reagent immediately after it’s added to the mix. Using a master mix also helps minimize the need to pipette really small volumes, which can push the limits of the pipette’s accuracy.
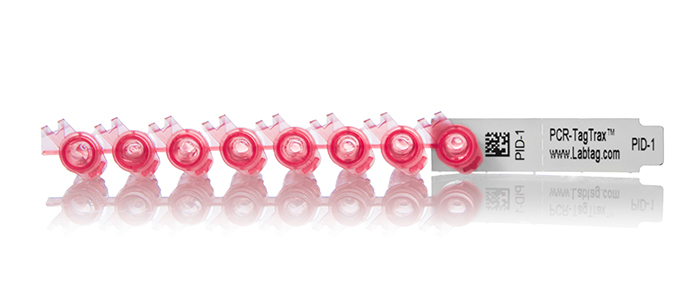
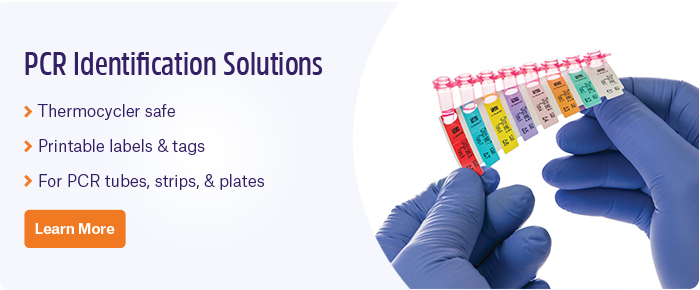
7 – Use Proper Labels
Labeling is crucial to avoiding errors in PCR. However, the space afforded on PCR tubes and quantitative PCR (qPCR) plates is usually relatively small, making handwriting an inefficient way of identifying your samples. There are a few labeling solutions for PCR tubes, strips, and plates currently on the market, but the best one is PCR-TagTrax™, a glove-friendly, adhesive-free tag that fits around the conical portion of the tube. The tags allow for more information to be printed than other labeling methods, can be color coded, and are compatible with most thermocyclers.
8 – Track Samples with a LIMS
Integrating a laboratory information management system (LIMS) with barcode labels is another great way to improve the trackability and traceability of your PCR samples. As each DNA sample is generated and processed, the barcode labels are scanned into the system, with the LIMS recording each task as it’s performed. It can also organize the storage and usage of your samples and reagents, keeping you up to date on their placement in lab freezers and refrigerators as well as the volumes remaining in every tube.
9 – Limit the number of samples
This tip is relevant for almost any assay you perform in the lab. Working with less samples means that they’re easier to track and avoids the confusion that arises when processing sample after sample over a long period of time. PCR is especially prone to error when using many samples because the tubes are so small that differentiating the 25th from the 26th tube can often be difficult. Though barcode labels can help avoid these errors, it’s always a good idea to avoid running more samples than necessary and to space out each assay, if possible, so that you feel comfortable with the workload. In addition, while running multiple sets of primers together might save you time, this can lead to unnecessary errors if their annealing temperatures are different. Even when the temperatures are close, it is still not recommended.
10 – Match up pipette tips to sample tubes as samples are added
This may seem like a relatively obvious trick, but when dealing with rows and rows of samples, particularly if loading a 96-well plate with a single-channel pipette, it’s critical to have a system in place to give you confidence that you’ve added the correct samples into the appropriate tube. It’s easy to lose concentration after pipetting more than 5 to 10 times in a row, so looking back and matching the rows of the tips in a box to the rows of samples that need to be pipetted will guide you as each sample is added. If you’re ever unsure about making a mistake, you can look back at the exact tip placement to know if an error has occurred.
11 – Choose the right polymerase
There is no one-size-fits-all DNA polymerase for PCR, so it’s important to select the right one before running your experiment. For routine PCR runs, a standard thermostable polymerase is acceptable, as they generally have fast extension rates; however, they cannot proofread, and should therefore be avoided for cloning and mutagenesis studies.
If you’re starting with a small amount of template, Hot-Start (HS) polymerase might be useful, as it reduces nonspecific amplification, increasing the yield of your desired fragments. Again, this type of polymerase is incompatible with cloning and mutagenesis because it lacks proofreading ability.
If you do need a polymerase for cloning or mutagenesis studies, consider a high-fidelity (Hi-Fi) polymerase, which can proofread due to its 3’-to-5’ exonuclease activity and its ability to remove erroneous bases from the DNA strand.
12 – Pick a comfortable place to work
Stress and fatigue play a large role in contributing to laboratory errors. It’s important to pick a comfortable workstation that will provide maximum support for your wrists, neck, back, and legs. The longer you can go without placing strain on your joints, the less chance there is of slipping up and making a pipetting error.
13 – Color code
No, we’re not talking about the different colored probes that can be used to distinguish PCR products, although these are helpful tools as well. Color coding your containers is an easy way to avoid mix-ups when running PCR. Using colored tubes, labels, and even PCR mixes containing dyes are great ways to identify reagents prior to setting up reactions. Just be sure to test your colored components before use; some dyes may not be compatible with PCR, so it’s worth testing before to make sure they won’t result in lost DNA samples.
LabTAG by GA International is a leading manufacturer of high-performance specialty labels and a supplier of identification solutions used in research and medical labs as well as healthcare institutions.

