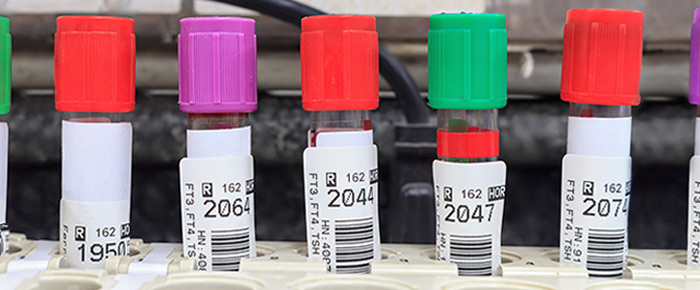
Labeling isn’t just a laboratory task; it can be science itself, requiring the right amount of technical expertise and testing to get it just right. Below are several examples of common labeling mistakes made when identifying samples and inventory, with some helpful tips on how to troubleshoot them.
#1 – Handwriting on labels
Writing labels by hand is simply the most inefficient way of identifying samples. By doing this, you lose all ability to adequately track samples, even if the marker you use is resistant to ethanol. This is because the space afforded on smaller tubes and vials doesn’t allow for proper identification; only a few notes can be included via handwriting, like the sample number and date. In contrast, printing barcodes on your labels allows each sample to be linked to a database containing all pertinent information, which can be accessed much quicker than manually referring to notebooks for sample data.
#2 – Using the wrong label
Excuse the cliché, but the saying is true: not all labels are created equal. It’s tempting to buy a single type of label and apply them to every tube, vial, and flask throughout the lab. However, the truth is that using one label for everything runs the risk of it falling off at the most inopportune time. For each application, it’s necessary to understand the environment of the samples so this doesn’t happen.
There are at least three major categories of lab labels: chemical-resistant, cryogenic, and heat-resistant. Cryogenic labels are well suited for liquid nitrogen storage, heat-resistant labels are tailored for sterilization protocols like autoclaving, and chemical-resistant are specialized for applications like histology that require submersion of samples in harsh organic solvents. With that said, there are options for applications that require a combination of any of the three. For instance, wrap-around cryogenic labels, which provide an extra lamination layer, can give the label a little more resistance against solvents. There are also other specialized labels besides those from those three categories, including tamper-evident labels, piggyback labels, and blackout labels, among others, which are necessary for specific applications.
#3 – Using the wrong printer
If you’re already printing labels, it’s worth verifying whether you have the right printer for the job. Certain printers work better than others, especially when it comes to harsh lab conditions. We recommend thermal-transfer printouts for the harshest environments, including chemical exposure and extreme temperatures. However, digital printers (laser, inkjet) do not provide much resistance to these conditions, though they can produce vibrant color images, whereas thermal-transfer printers cannot.
Note that other factors besides the sample environment should be considered when selecting a printer. Thermal printers, including thermal-transfer and direct thermal, are print-on-demand systems; there is no waste as only the necessary amount of labels are printed at one time. Digital printers are generally less cost-efficient, as they require sheets of labels printed with ink or toner cartridges that generate high amounts of waste.
It’s also worth verifying that the printer doesn’t utilize a system based on digital rights management (DRM). DRM limits the user to printing only labels produced by the printer manufacturer, usually via RFID-encoded label rolls. This means that you’re limited in your label choice, likely hindering your ability to customize the identification solution to your specific needs. Remember, many label manufacturers make specialized products not offered by these DRM-based manufacturers.
#4 – Applying labels by hand
For small batches of tubes (i.e., 1-5 dot labels), labeling by hand may be practical. For larger batches, having a label applicator, such as the patent-pending PikaTAG®, is recommended. This handheld label applicator has an ergonomic design, making the application of small dot labels easier and faster. It can even be used for cell culture freezing vials with indented caps.
For even larger volumes of samples, automated labeling systems are ideal. Systems like those supplied by Scinomix are capable of labeling tubes and printing labels, scanning barcodes, and filling and decapping/recapping tubes.
#5 – Putting regular labels on frozen surfaces
Many have tried to apply all-purpose labels to wet surfaces, and few have succeeded. For that matter, it’s nearly impossible to even write by hand on wet plastic. Fortunately, specialized labels like NitroTAG® and CryoSTUCK® are designed for this exact purpose. NitroTAG labels adhere to wet and damp surfaces, while CryoSTUCK labels can be applied to frozen tubes at -80°C and immediately stored back in cryogenic conditions, including liquid nitrogen Dewars.
#6 – Printing too much information on the label
Labels should be fitted to the exact size and shape of the container they are identifying; therefore, there is always a set amount of space that can be used to print information. Because labs depend on relatively small containers, such as microtubes and vials, it’s important to restrict the amount of information printed on each label. Too much information risks making it difficult to quickly and accurately read individual labels. Ideally, barcodes should be used with a minimal amount of serialized text, allowing users to both identify samples quickly and scan them to provide finer details.
#7 – Not using barcodes (or RFID)
Speaking of barcodes, one of the biggest labeling mistakes is solely using serialized text to identify samples. The main problem is that information from individual samples is not directly linked with a database. Sure, there may be an excel file detailing the identity of the sample, but manually searching for this information every time is laborious and prone to error. In contrast, a barcode (or RFID) identifier links the sample with the database in real-time, requiring only a scan to bring up sample data. Paired with an electronic laboratory notebook (ELN), barcodes enhance the tracking and traceability of all samples and inventory in your lab, providing more visibility to your workflow.
#8 – Not grading barcodes
Barcode quality can vary widely based on various factors such as their design, the printer used, or the label’s surface. Crucially, the quality of your barcodes determines how accurately and consistently they’re read. Barcode grading is a method of verifying that your barcodes meet a sufficiently high standard to prevent scanning errors. Using a specialized machine like the TruCheck Omni, a series of parameters, like contrast, uniformity, and defects, are assessed in order to determine barcode quality. Ultimately, this assures that your barcodes will be scanned properly when the time comes.
#9 – Not testing your labels first
As with any new technique, performing a test run before running samples is necessary. The same applies to labeling, as running a full experiment without knowing whether your labels will withstand the environmental conditions of your containers risks failure. The best way of doing this is to obtain free samples directly from the manufacturer. It’s also worth collaborating with the manufacturer to provide a tailored label solution that perfectly matches the size and shape of the container and any temperature variations and chemical exposure they may be subjected to.
#10 – Not using dedicated software to print labels
While Word templates can be useful for simple text labels, it’s much more efficient to use dedicated software like BarTender for printing barcodes. This type of software provides a multitude of customization options, allowing you to design optimal barcodes that match the label’s size and ensure that quality is maintained so that they can be read accurately. Barcode printing software is also adaptable enough to integrate databases from ELNs and other electronic platforms, making large-scale barcode generation an efficient process.
LabTAG by GA International is a leading manufacturer of high-performance specialty labels and a supplier of identification solutions used in research and medical labs as well as healthcare institutions.


