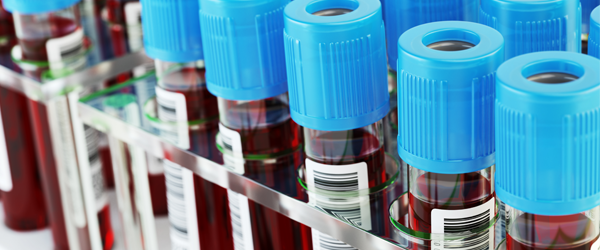
 Appropriately labeling specimens for pathology labs is of critical importance. The College of Pathologists previously evaluated the average cost of labeling errors at approximately $280,000 per million specimens, adding up to over $1 million dollars a year for some of the larger institutes.1 Specimen labeling errors also result in the failure to provide proper and immediate care for patients, which can severely harm the patient, resulting in unnecessary morbidity and mortality.2
DON’T forget to label the tube
This is the worst possible thing to do when collecting ANY specimen, whether it comes directly from a patient or is being processed in the lab. Without a label, specimens will often be rejected by the pathology lab, adding extra risk to the patient, who will need to supply a fresh sample for analysis.
DO label the tube directly
It’s imperative that the tube containing the specimen have a label affixed directly to it. Merely sticking the label inside or on the bag that the container is placed in is a poor idea, likely to result in the vessel becoming unidentified later, when the specimen goes for processing.
DON’T use a pen to label
If the tube isn’t properly closed or the seal breaks, the contents of the tube can mix with the printout of the label and cause the ink to smudge or run. This is especially important for samples containing chemicals like formalin. Ultimately, you can be left with an unidentifiable tube. If handwriting is absolutely necessary, use an alcohol-resistant fine-tip marker. Ideally, printed labels should be used with barcodes. It’s handy to use a thermal-transfer printer with a smudge-proof resin ribbon, as the printout will resist most harsh solvents, such as formalin and alcohols, and won’t rub off like pen or other types of ink would.
DO attach the label properly so the barcode can be scanned
Affixing the label appropriately to the tube is crucial for properly identifying the specimen during the pre-analytical phase of processing.
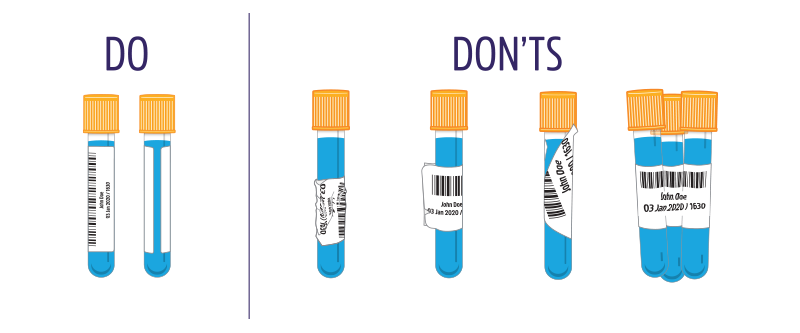
- DO place the label straight along the length of the tube, with the name at the top. This ensures the barcode can be scanned while still providing ample space to view the contents of the tube.
- DON’T leave little bumps in the label. Instead, make sure it’s flush with the surface of the container. The little bump or wrinkle that’s left can make the barcode hard to scan. This can prove to be difficult when using specimen labels with permanent adhesives, as the label can easily become damaged. However, if there is a bump, reaffixing the label is necessary because merely applying a new label over the top of the old one does not remove the original bump.
- DO use the correct size label. Using a label that’s too big for the tube will result in the label covering the lid of the tube, giving it a “turtleneck” appearance. This scrunches the label and can render the barcode unreadable. It also damages the label when the tube is opened, in addition to making the tube harder to open.
- DON’T wrap the label around the tube horizontally, diagonally across it, or as a flag on it. If the tube is labeled in this way, the scanner may not be able to fully read the barcode. In many instances, the barcode might be covered by the label, making it impossible to read. It may also make processing difficult or impossible, depending on the sample and/or the machine being used.
 DON’T identify multiple tubes with one label
DON’T attach one label to 2 or more tubes. Just don’t do it, even if they come from the same sample. It’s an easy way to misidentify specimens and lose track of them as they’re processed, which means a lot more time later to track down new samples and/or explain a false diagnosis.
DO double-check that all relevant information is correctly printed on the label
Before passing samples down to the lab, it’s worth checking if the information is correct on the label and matches any other documentation that comes with it. A double-check using the patient’s identifiers immediately when the sample is taken is the best way to ensure mismatches don’t occur. The sample type, including the tube used to collect it as well as the cap, should also be double-checked before the sample is sent out.
DON’T use generic labels for specimens that are stored in liquid nitrogen or transported on dry ice
For samples stored in cryogenic conditions, using generic paper labels can be a major risk, as they are likely to fall off the tube when immersed in liquid nitrogen or transported on dry ice. Instead, use cryo specimen labels, which are coated with an adhesive that’s engineered to resist temperatures as low as -196°C (-321°F) and remain securely affixed, even during long-term cryogenic storage.
DO use appropriate labels for sample processing
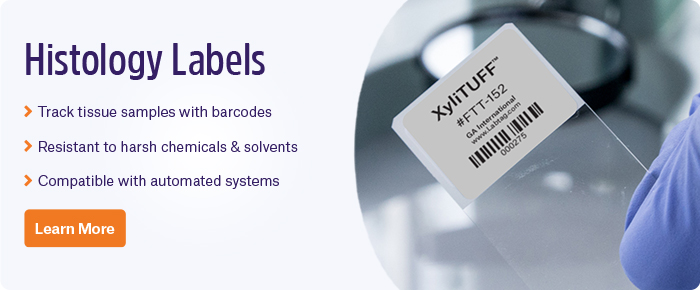
- DO use chemical-resistant labels when processing samples for histology. As samples are treated for histochemistry or immunohistochemistry, they require labels that withstand harsh chemicals and stains, such as xylene, hematoxylin, and eosin.
- DON’T use automated slide printers. The printouts generated using slide printers that automatically label the glass itself are not as resistant against harsh solvents as thermal-transfer printouts.
- DO use thermal-transfer printers. Printouts generated using these printers are resistant to many strong chemicals used during fixation, including formalin, as well as ethanol, xylene, new xylene alternatives/substitutes, and histological stains. They also withstand cryogenic storage far better than handwriting or printouts generated using inkjet or laser printers.
LabTAG by GA International is a leading manufacturer of high-performance specialty labels and a supplier of identification solutions used in research and medical labs as well as healthcare institutions.
References:
- The Problem of Mislabeled Specimens. Northfield, IL; 2010.
- Martin, H; Metcalfe, S; Whichello R. Specimen Labeling Errors: A Retrospective Study. Online J Nurs Informatics. 2015;19(2):1-11.


