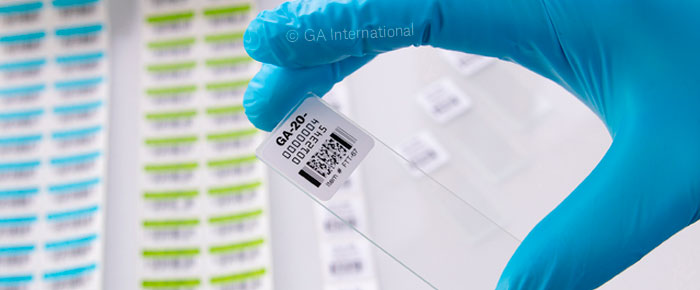
Microscopy is one of the oldest techniques in biomedical research, dating back to the 16th century. As labs continue to grow, so too does the number of specimens. This is particularly true of fields that rely on microscopy, including histology and pathology departments that process thousands of patient samples daily. Here are several tips that can help track and trace these growing numbers of microscope slides, allowing labs to minimize errors and increase cost-efficiency and overall productivity.
Consider chemical exposure
Fixation technique
Fixation requires a series of steps that vary widely depending on the type of sample and microscopy being used. The most commonly used fixative is formalin, used predominantly for histochemical staining. While formalin fixation protocols are typically not performed directly on microscopy slides, other protocols, such as those using yeast, can involve the adhesion of cells to the slide prior to fixation. These protocols involve immersing the slides directly in containers of methanol and acetone during the fixation/digestion step. Here, it is necessary to ensure that labels affixed to the slides are not removed while immersed in these compounds and that they will not smudge or smear.
Staining procedures
Most staining procedures used for fluorescence and electron microscopy do not require full slide immersion. However, immersion in hematoxylin and eosin in histochemistry is a critical step to later visualize the tissue’s cells and structures. These stains can also smudge printouts, cause labels to absorb color, making text and barcodes hard to read, and may even result in labels peeling or falling off entirely.
Overall, when accounting for fixation and staining, it is essential to utilize labels that resist harsh chemicals in addition to implementing a printing method that is resistant as well. Therefore, it is recommended to use labels such as XyliTUFF™ (for extended exposure to harsh chemicals) or StainTUFF™ (for routine staining protocols) in combination with a thermal-transfer printer. Thermal-transfer printouts generally provide the maximum resistance to all types of harsh environments, including chemical exposure and extreme temperatures.
Account for temperature variations
Temperature is not often associated with microscopy due to the nature of the technique; samples are usually fixed and viewed at room temperature. However, some protocols, such as those used for heat-induced antigen retrieval (a common technique in immunohistochemistry), may require temperatures as high as 95°C. For these conditions, it is recommended to use chemical-resistant labels that come with an over-laminating flap, like HistoLAM™, which can withstand not only immersion in xylene and its substitutes but also temperatures as high as 120°C.
Storage is another area that is often overlooked when considering labeling microscope slides. While many slides can be stored at room temperature, some may require storage in either +4°C refrigerators or low-temperature freezers. For these, it is useful to ensure that the label can accommodate the necessary temperature fluctuations. For instance, one might consider using general purpose labels for microscope slides that aren’t exposed to any harsh solvents; however, these labels would not be appropriate if the slides are to be stored at -20°C. It is worth noting that most chemical-resistant microscope labels, including XyliTUFF, StainTUFF, and HistoLAM, can resist temperatures as low as -80°C.
Re-label appropriately
Re-labeling may be necessary for slides that have either been transferred from one department to another or that have been sent to another facility for further processing. For slides that have changed departments, Histo-PinTAG™ as they have been designed for this exact purpose. The small dot covers the existing 2D barcode, while the rectangle portion can be used to add newly printed information to the slide, including a barcode, without concealing any of the other existing data. These labels are also fully removable in case the original barcode needs to be accessed at a later date.
Implement an efficient tracking system
The best way to track and trace microscopy specimens is by using a cloud-based laboratory information management system (LIMS). Using a LIMS alongside barcodes or RFID labels, inventory and newly processed samples can be tracked, from fixation to viewing, ensuring each slide is accounted for and its location marked. RFID XyliTUFF labels incorporate a small and flexible UHF inlay, perfect for labeling microscope slides, while also providing the necessary chemical resistance required when labeling slides for histology. Cloud storage also ensures that data is securely stored, with minimal hardware and software installation, providing remote access to information, with updates supplied automatically upon scanning microscope slides.
The choice to use either RFID or barcodes should be based on the lab’s needs. While costlier to implement, RFID has a general advantage over barcodes in terms of speed, as multiple samples can be scanned simultaneously without a direct line-of-sight. However, barcodes provide more flexibility, especially for samples that must be shipped outside the lab. If choosing to integrate RFID labels, it may be helpful to utilize both RFID and barcodes, as recent technology now allows almost any label to be outfitted with an RFID chip inlay. Thus, labels can be encoded with RFID and printed with barcodes using a single thermal-transfer RFID printer, providing a secondary method of tracking in case the RFID chip fails to scan.
LabTAG by GA International is a leading manufacturer of high-performance specialty labels and a supplier of identification solutions used in research and medical labs as well as healthcare institutions.


